2026-05-29
[Dr. Koh Seung-jo's Lecture Notes] Mastering Photoshop for Nose Surgery, Part 2
Learn how to use Photoshop to predict post-surgery nose shapes and perform self-corrections before consultation. This guide focuses on adjusting the nasolabial angle and nose tip for a natural, balanced look, especially for protruding mouths.
![[Dr. Koh Seung-jo's Lecture Notes] Mastering Photoshop for Nose Surgery, Part 2](/uploads/uberps1/223790907822/8a2affa2ca41fa4b.jpg)
#NoseSurgery #Rhinoplasty #PortraitRetouching #FaceRetouching #NoseRetouching #ShortNose #Photoshop #Photoshop #Columella #NasolabialAngle #Septum #ProtrudingMouth #ProtrudingMouthNose #NoseTip #NoseBridge #Glabella #BulbousNose #AquilineNose #GangnamNoseSurgery #GangnamStationNoseSurgery #GangnamStation #WeversPlasticSurgery #SeoSeungjo #ShimJeonghwan #ParkSunhee
Hello.
💖Your beauty universe! This is Dr. Seo Seung-jo from Wevers Plastic Surgery :)💖
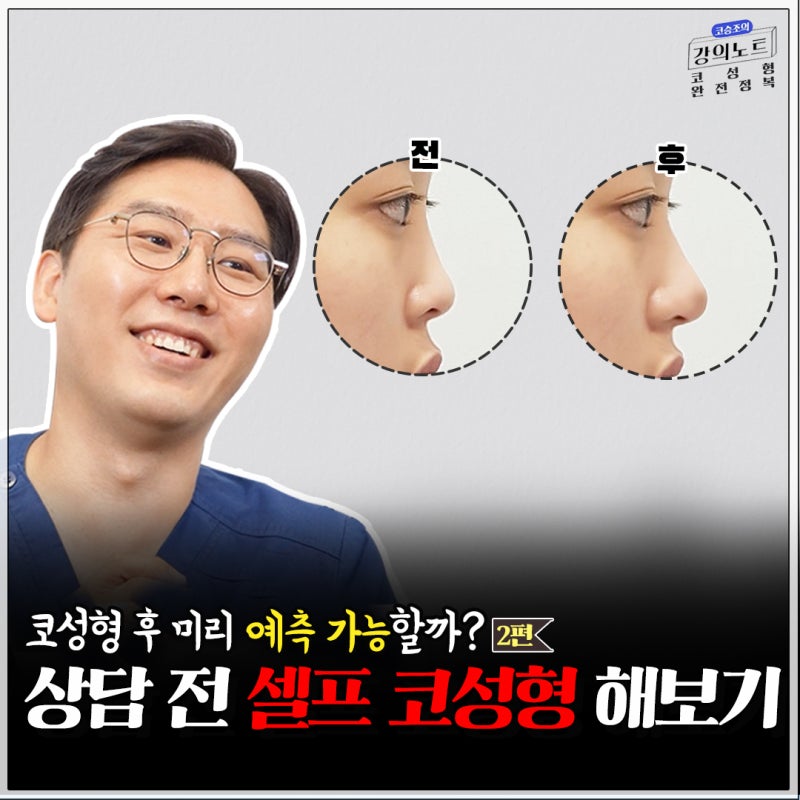
‘Can Photoshop predict the shape of the nose after surgery?
Showing you directly with Photoshop
Nose Correction Before & After’
These days, various photo editing apps seem to be well-developed.
So, when you use a Photoshop app for face retouching,
you can heighten the nose bridge, nose tip, and do various other things.
Today, I'd like to show you a method for self-correcting your nose before a consultation,
using nose correction techniques.

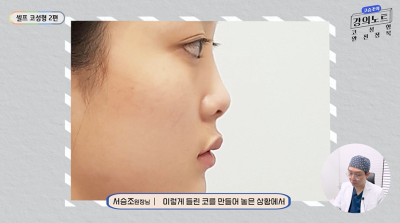
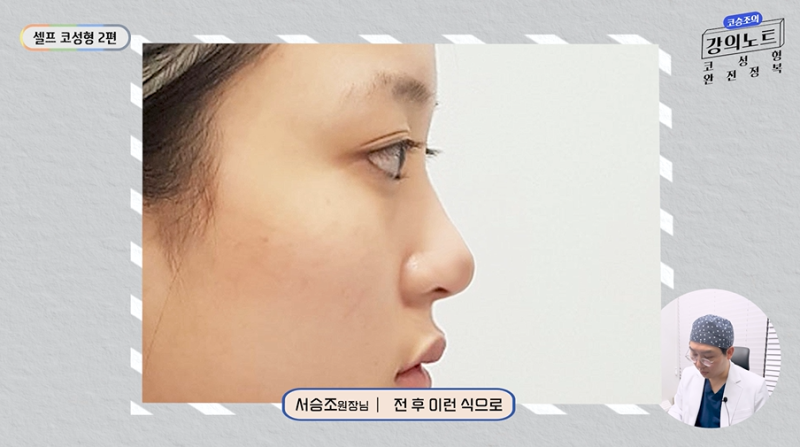
This particular patient has a protruding mouth.
How do we correct the nose to compensate for such a protruding mouth?

We need to make this point (nasolabial angle)
come forward a bit more.
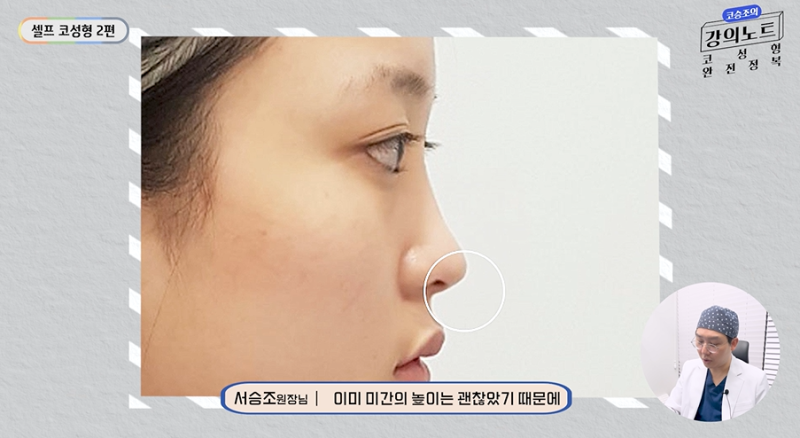
For this patient, the glabella's position seems appropriate,
but the nose tip is a bit low, making it look pressed down.

I slightly reduced the philtrum area, lowered it a bit so the lips don't touch, and raised it slightly.
What happens to the nose then?

It will be a slightly upturned nose compared to before, right?
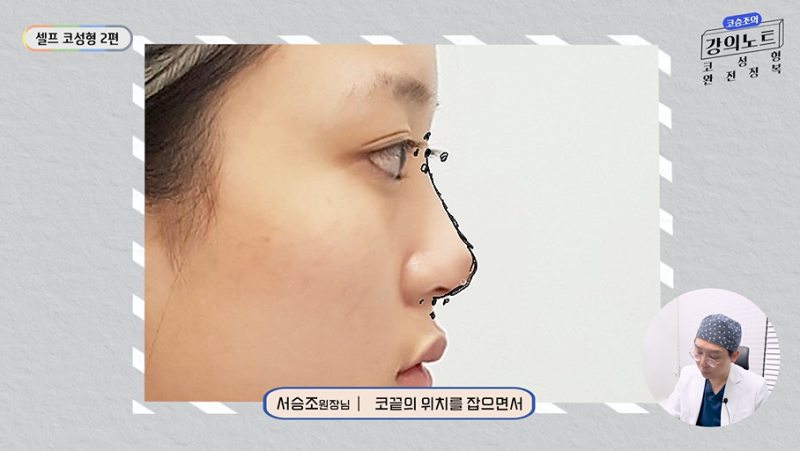
In this situation, with the nose created like this,
if we gradually pull the nose tip forward,
doesn't it seem to create a good nose?

Since this person's glabella height was already good,
1. I didn't touch the glabella.
2. I set the nasolabial angle position.
3. I set the nose tip position.
4. Finally, I connected the nose tip and the glabella.
The nose shape became much softer and more natural than before the correction, didn't it?
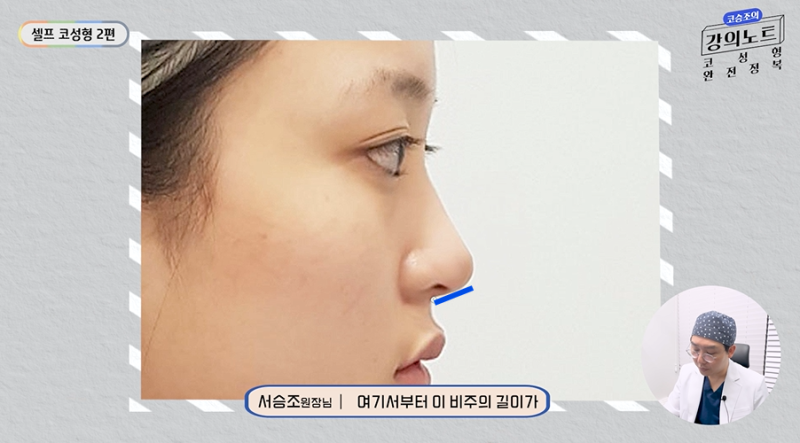
This is because the length of the columella
did not become too long.
As the previously hidden nasolabial angle emerges, the mouth appears less protruded, and designing it this way results in a good nose.
In fact, when I perform surgery, I also look at the patient's photos to determine where the glabella should start.
What does it mean to look at the starting point of the glabella?

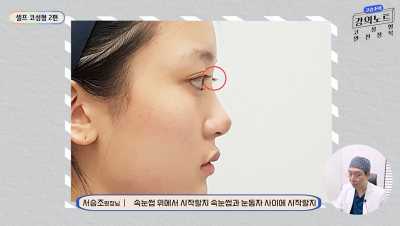
Whether to start the nose above the eyebrows or above the eyelashes,
or between the eyelashes and the pupil,

or around the pupil, and also decide on the front-to-back three-dimensionality to set the starting point.
Then, we determine where the nasolabial angle should be,
and then, as I mentioned in Part 1,
we draw a triangle.

When you draw a triangle,
the upper, middle, and lower ratios of the face change depending on which angle looks most beautiful.

So, you need to decide whether to set the nasolabial angle point
here, or here, or here, or here, or here.
And similarly, you also need to decide whether to make the nasolabial angle more forward than it originally was, or lower it, or make it more forward again.
After making these decisions, you set the points, and then, while setting the position of the nose tip,
you can think of it as connecting them in this way.
At this point, when connecting, if it's too straight based on this patient's nose,
it might look like an upturned nose.
If it's soft, it will give the impression of a 'jikban-beoseon' (straight-upturned) nose.
If you design it this way,
I think you'll be able to understand what a more natural nose is,
even when you're using Photoshop yourself.
Here's an important key point🔑
★You shouldn't just think about designing the nose.★
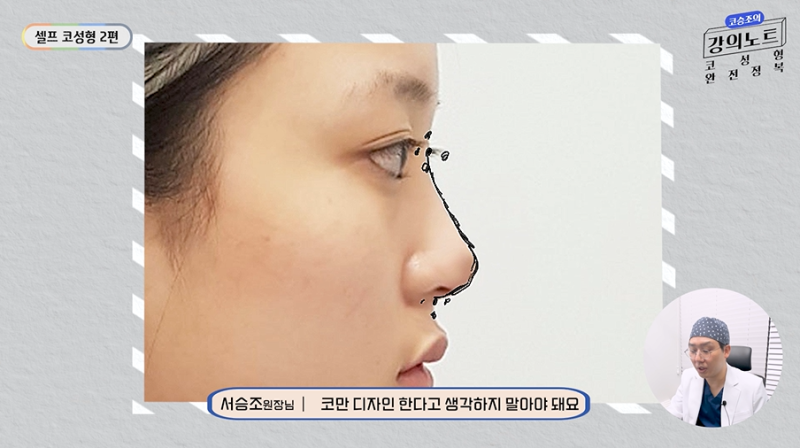
Many people only think about designing the nose,
constantly moving only the nose tip and the starting point of the nose bridge,
and hardly touching the nasolabial angle.
The most important thing, in the end, is
that the nasolabial angle point must be corrected well.
Depending on where the nasolabial angle point is set, both the three-dimensionality of the face and the naturalness of the nose can be determined.
After that, whether to create a curved nose bridge
or make the nose tip more pointed
is a matter to consider after the nasolabial angle point has been determined.
https://www.youtube.com/watch?v=_IWMdeArL3I
💖If you have any more questions?


Frequently Asked Questions
Can I predict the post-rhinoplasty appearance using Photoshop before surgery?
Yes, you can predict the post-rhinoplasty nose shape using Photoshop or editing apps. It's possible to preview the most suitable and natural nose design for you by adjusting not only the height of the bridge and tip but also the position of the nasolabial angle.
How should I design my nose to complement a protruding mouth?
The key is to correct it by bringing the nasolabial angle slightly forward. Rather than focusing solely on raising the nose tip or bridge, making the hidden nasolabial angle protrude can make the mouth appear less prominent and create a much softer nose shape.
What is the order for natural nose correction?
It is best to set the positions in the order of glabella, nasolabial angle, and nose tip, and then connect them last. If the glabella height is appropriate, leave it untouched; first set the positions of the nasolabial angle and nose tip, then smoothly connect the nose tip and glabella to ensure the columella doesn't become too long and appears natural.
What is the most important point to consider when designing rhinoplasty?
The most important thing is to accurately correct the nasolabial angle point. The position of the nasolabial angle determines the overall facial立体感 and the naturalness of the nose, while whether the bridge is curved or the tip is sharp is a decision made afterwards.
How is the starting point of the glabella determined?
Considering the patient's facial proportions and three-dimensionality, an appropriate position such as above the eyebrows, eyelashes, or pupils is determined. After first establishing the starting point of the glabella and its front-to-back three-dimensionality, the position of the nasolabial angle is set, and a triangle is drawn to find the most beautiful angle that fits the upper, middle, and lower facial proportions.