2026-05-29
[Seung-jo's Nose Lecture Notes] How to Photoshop Rhinoplasty Well - Part 1
#Nose #Rhinoplasty #NoseLine #BeforeAndAfterRhinoplasty #Photoshop #NoseRetouching #PhotoshopNoseRetouching #PortraitRetouching #NoseBridge #StraightCurvedLine #StraightLine #Columella #NasolabialAngle #ProtrudingMouth #StraightCurvedNose #StraightNose #FemaleNose #MaleNose #Uber #GangnamStation #UberPlasticSurgery #SeoSeungJo #ShimJungHwan #ParkSunHee Hello. 💖your beauty universe! I am Dr. Seo Seung-jo, head director of Uber Plastic Surgery :)💖 Lately, before coming in for a plastic surgery con
![[Seung-jo's Nose Lecture Notes] How to Photoshop Rhinoplasty Well - Part 1](/uploads/uberps1/223763668698/a1e8e8df5acbca1c.jpg)
#Nose #Rhinoplasty #NoseLine #BeforeAndAfterRhinoplasty #Photoshop #NoseRetouching #PhotoshopNoseRetouching #PortraitRetouching #NoseBridge #StraightCurvedLine #StraightLine #Columella #NasolabialAngle #ProtrudingMouth #StraightCurvedNose #StraightNose #FemaleNose #MaleNose #Uber #GangnamStation #UberPlasticSurgery #SeoSeungJo #ShimJungHwan #ParkSunHee
Hello.
💖your beauty universe! I am Dr. Seo Seung-jo, head director of Uber Plastic Surgery :)💖
Lately, before coming in for a plastic surgery consultation, everyone tries Photoshopping their photos at least once,
and says, 'Please make it look like this Photoshop'
as they bring their photos with them.
While there are some who do a great job with Photoshop,
there are also those who don't quite get it right.
Today, we will learn how to do a DIY rhinoplasty
and how to design a nose.
Important Points and Methods for Rhinoplasty Design
The characteristic of those who do a good job with Photoshop is
that they are usually easy cases for rhinoplasty,
whereas those who don't do it well
are mostly cases where touching only the nose is not enough.
In the latter case,
it is because many of them need the position of their nasolabial angle changed as well.
The method of designing your nose with Photoshop before going for a consultation
is actually quite simple in a way.
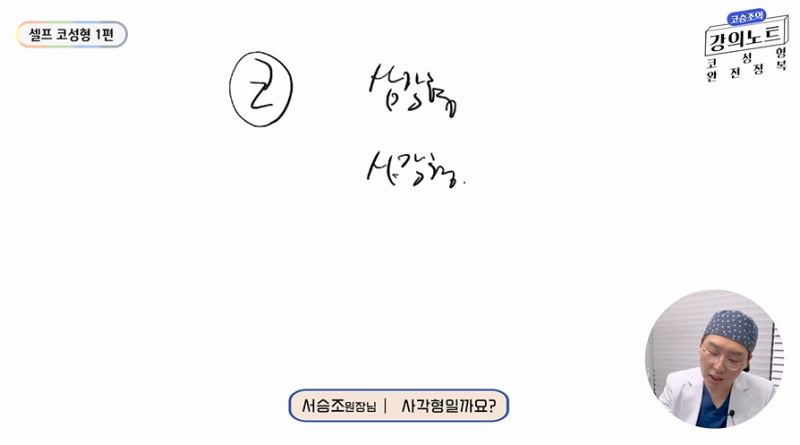
Is the nose a triangle? Or a square?
The answer is a triangle.
You can think of it as creating this triangle on your face.
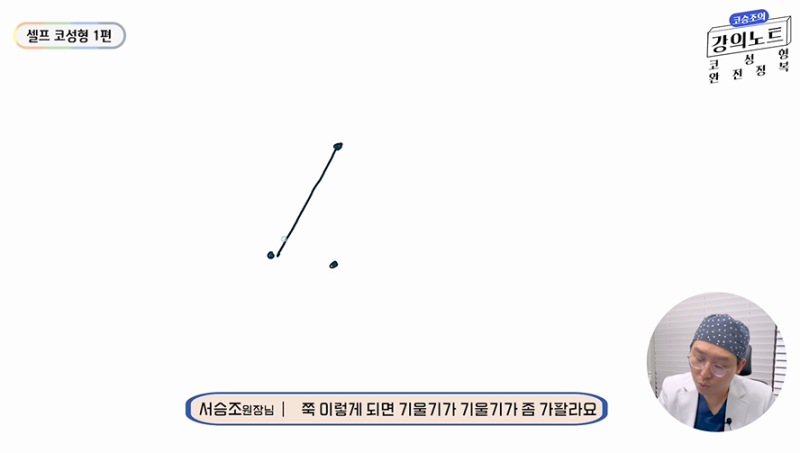
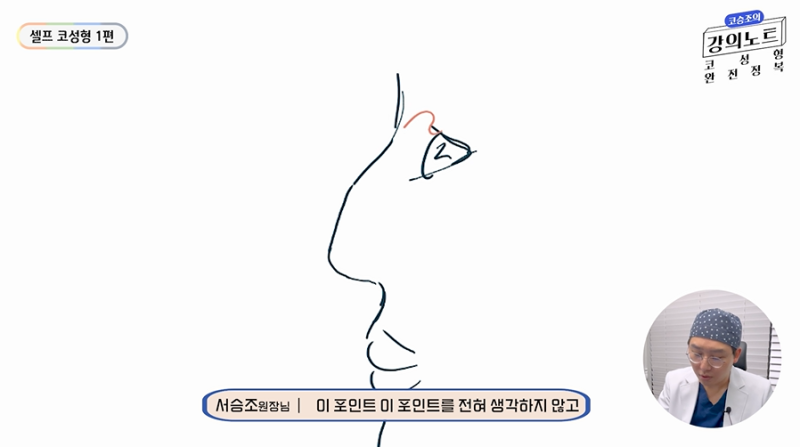
To make it, first, you just place exactly 3 dots.
If you place 3 dots—one, two, three—and connect them,
this becomes the nose.
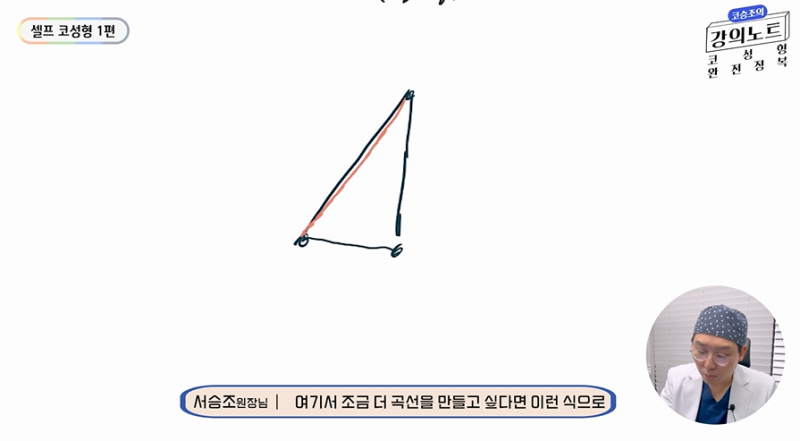
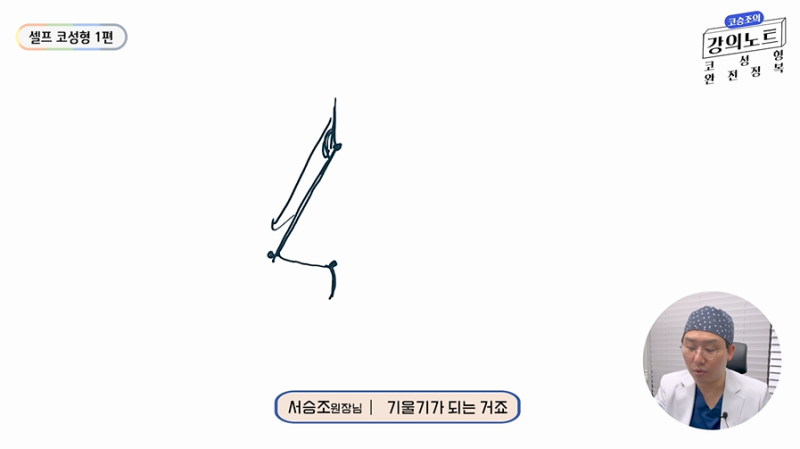
From here, if you want to make it a bit more curved, you draw a curve,

and then if you want to make the columella rounder, you shape it like this.
You can just place the dots thinking that you are creating a triangle in this way.
So, what is the most important thing when making this triangle?
It is the angle.
There are requests I hear a lot when patients come in for a consultation.
Please make the slope of the nose like this.
Please make the nasolabial angle this many degrees.
Please make the width like this.
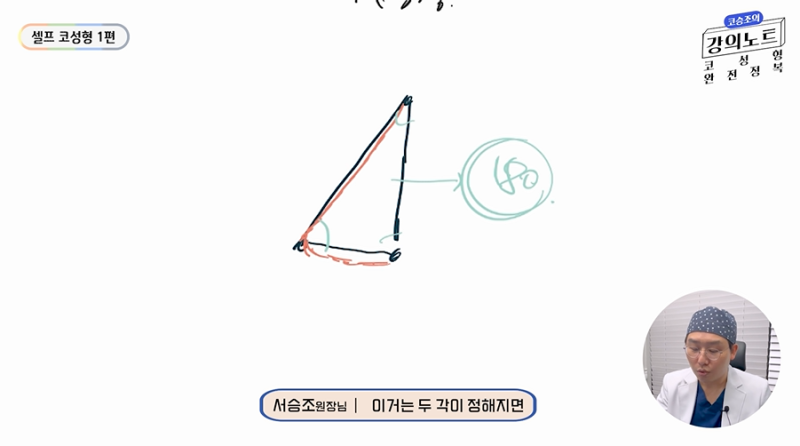
For reference, the sum of the three angles of a triangle is 180 degrees.
If two of the three angles are determined,
you must understand that the other one is inevitably predetermined.
Therefore, you cannot decide everything,
and among the slope of the nose, the nasolabial angle, and the width,
it varies depending on which one
you consider to be the most important.
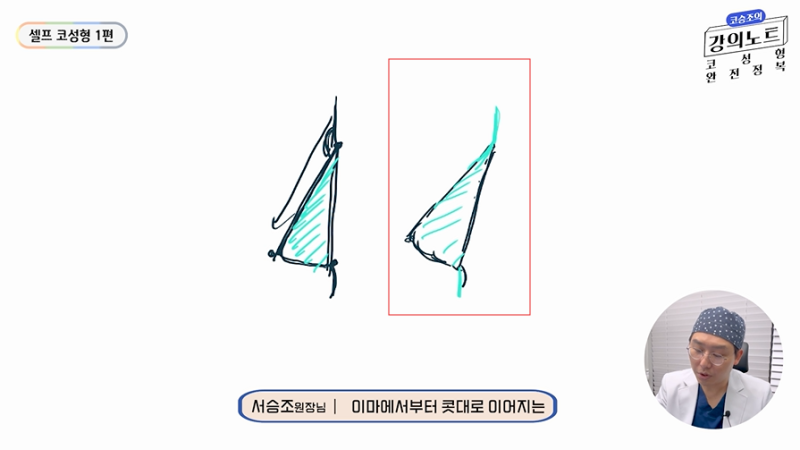
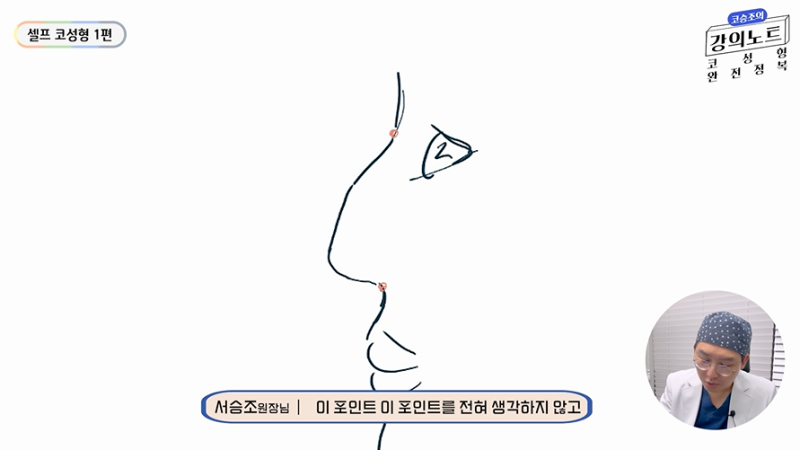
This is one of the nose lines.
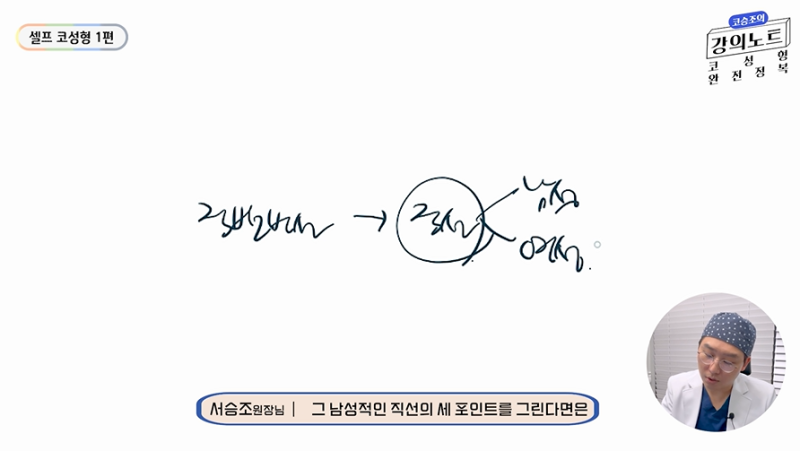
Among the straight lines, there is a masculine straight line
and a feminine straight line; it is divided into these two.
If we draw the three points of a masculine straight line,
assuming we set the starting point of the nose, the tip of the nose, and the point where the nose and lips connect,
when we connect the dots, the slope is a bit steep.
In other words, a masculine straight line
has a somewhat wider slope connecting from the glabella to the nose bridge,
and then it becomes a slope where this nasolabial angle gets narrower.
As this happens, the nose takes on a slope closer to a straight line,
and the nose is formed as it becomes a triangle.
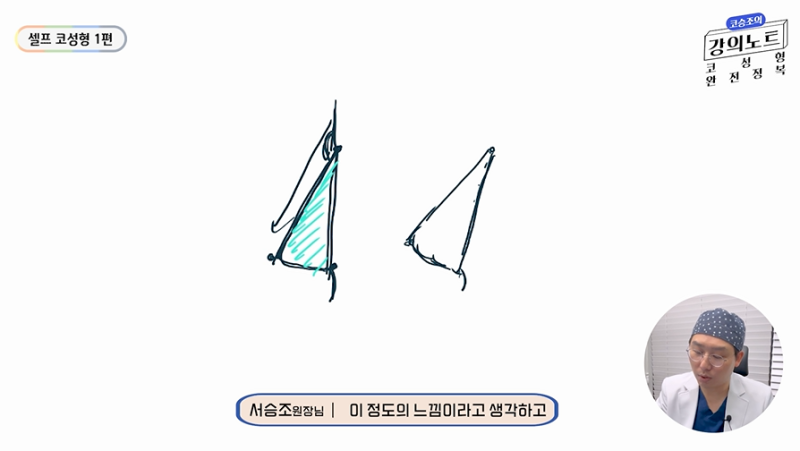
If we draw this triangle again, you can think of the masculine triangle as having this kind of feel,
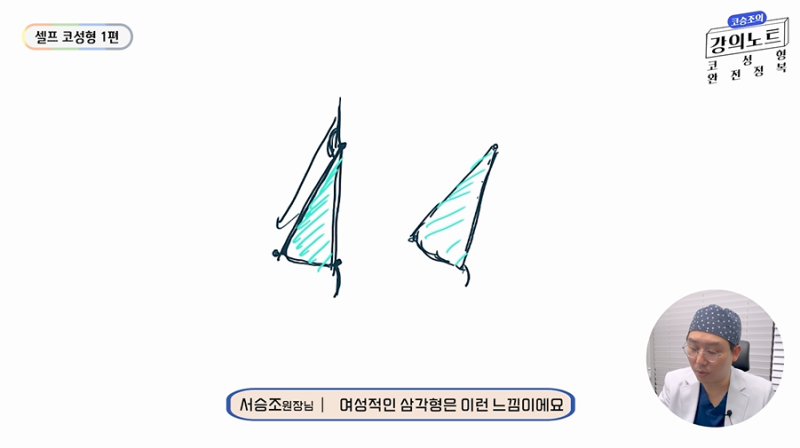
and the feminine triangle has this kind of feel.
That is, the starting point of the glabella, and from the glabella, from the forehead
to the nose bridge, this point,
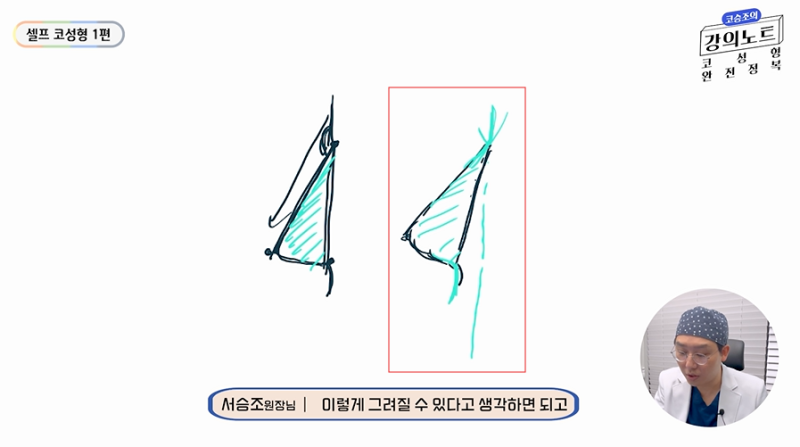
and then the gap between this point connecting from the columella at the nose tip to the philtrum,
the wider it gets, and the more front-to-back dimensionality is created,
the more the nose can be drawn in a direction that is slightly more upturned
or laid back,
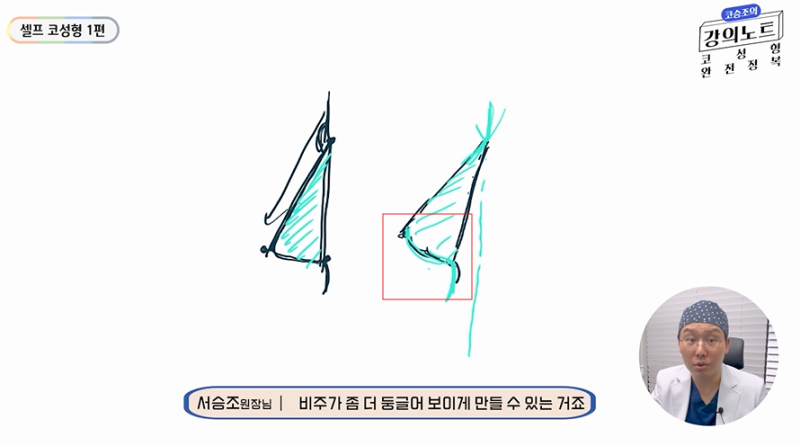
and when it is laid back like this,
it can make the columella look a bit rounder.
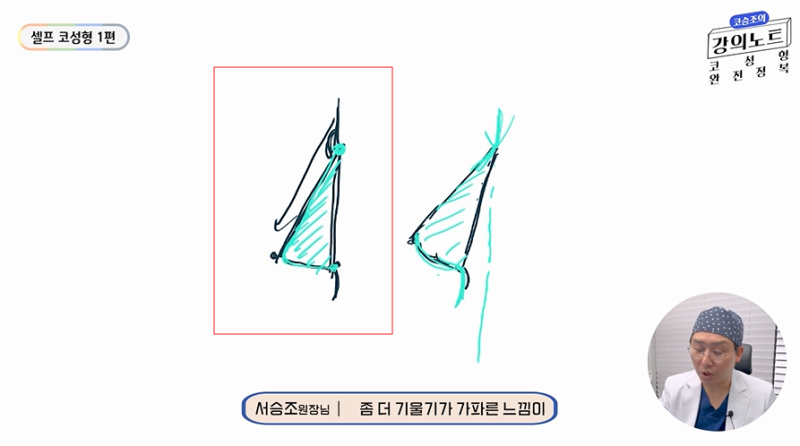
And in the masculine case, conversely,
because this nasolabial angle point and
the starting point of the glabella and the nasolabial angle point
are closer together, it gives a more straight-line feel,
and in this case, you can think of it as forming a nose with a steeper slope.
Assuming you try Photoshopping at home before getting rhinoplasty,
if it is a nose with a dorsal hump,
usually, patients
do not consider the glabella starting point and the nasolabial angle point at all,
but rather just keep shaving down the hump to shape the nose line,
often missing the step of moving the points.
Because they try to create the nose line without moving this point
from the columella to the philtrum,
the nose ends up looking pointy or elongated,
or the length of the nose tip becomes extremely long,
resulting in a poor design.
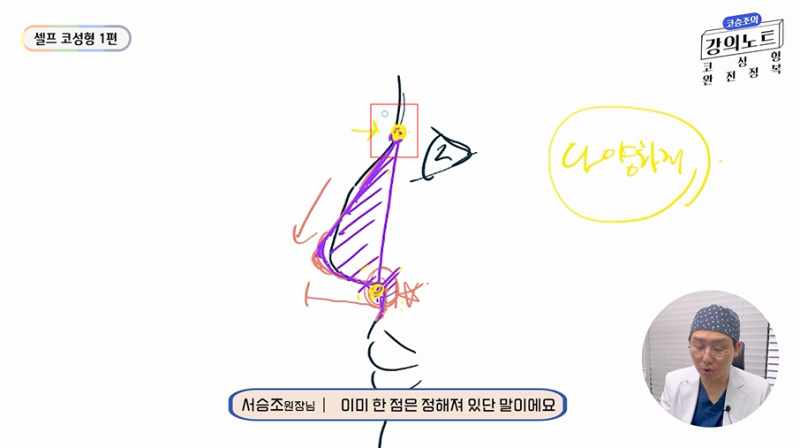
So, whenever we set the points, we also set the nasolabial angle point, but
you can think of it as setting it while considering where placing this point would look the prettiest.
When drawing it like that, how should this nose be shaped to look pretty?

If you set the line to the extent indicated by the purple line,
and then the point where the nasolabial angle is advanced forward,
if you connect the 3 points from the starting point of the nose bridge to the nose tip and the nasolabial angle point,
one, two, three—creating a triangle like this would be the prettiest.
Ultimately, when designing a nose with Photoshop,
1. Set the starting point of the glabella.
2. Next, set the nasolabial angle point, that is, the point connecting the columella to the philtrum, and then
3. Finally, setting the position of the nose tip
is considered the best approach.
However, for those who cannot significantly change
this glabella point and the nasolabial angle point,
a wide variety of nose shapes is not possible.
In that case, you can consider that the points that can create a pretty shape
are mostly already predetermined.
For example, in the case of the person I just drew,
because the glabella is hardly sunken at all,
not only can the glabella point hardly be changed,
but this point is already fixed.
This point cannot be changed much.
If so, how the nose tip should project,
and how much the dorsal hump can be shaved down are already predetermined.
For reference, when placing the points,
the glabella point shouldn't be too high either.
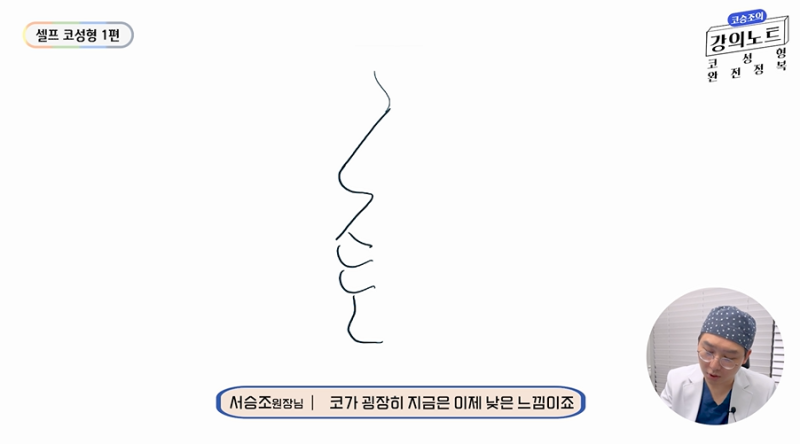
As an example, I drew a picture with a low nose and a protruding mouth feel.
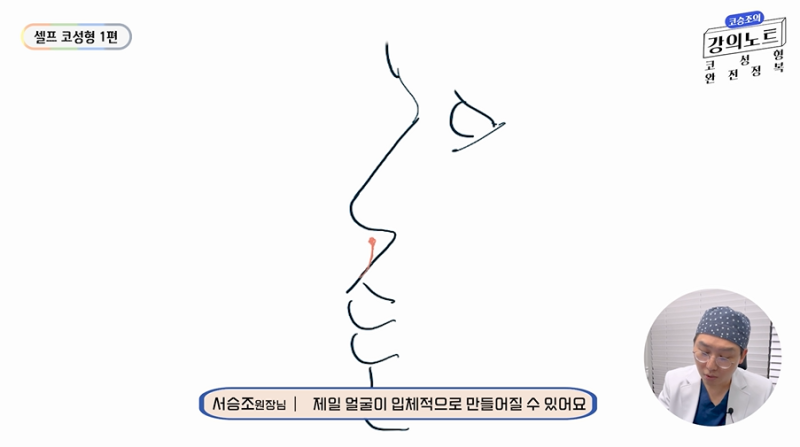
In this case, setting the nasolabial angle point to where the philtrum
stands at a slightly 90-degree angle
can make the face look the most three-dimensional.
Next, what's important is that assuming the alar (nostril) is like this,
it is best to set it to the point where it almost meets the lower part of the alar.
Assuming the nose bridge is raised to the line indicated in red,
the completed nose shape looks like this. (Right photo)
Other than that, you can think of it as drawing by setting detailed lines
such as the curve of the nose bridge and the shape of the nose tip.
Conclusion
When creating a nose, do not think about drawing the nose first,
but rather the starting point of the nose, the ending point of the nose, and the position of the nose tip.
Among these three points, the most important are
the starting point of the nose and the point connecting the nose to the lips.
In other words, placing the point where the upper face and mid-face connect,
and the point where the mid-face and lower face connect first,
and then drawing the connecting lines
is the way to create the most beautiful
and natural-looking nose.
https://www.youtube.com/watch?v=1Dy6VwIWbyM
💖If you have any more questions?